Questions About Planting Garlic?
Here are some answers to those questions. Planting garlic usually takes place in the late fall. Unless you live in a tropical climate, late fall planting will result in large, better developed cloves and fewer plant diseases. It is possible to plant garlic in the very early spring, however, heavy spring rains will result in much lower yields. In some parts of Europe, garlic is traditionally planted on the shortest day of the year - around December 21st. It is unclear if this tradition is based on practical reasons or on superstitions. It's usually easier to plant garlic sometime in late October or November as the ground has not yet frozen, making digging easier. You can plant garlic anytime after the first major fall frost appears.
We like to plant our garlic in mid-November. This is usually after the first hard freeze in the fall in our area, but well before our hectic holiday schedule starts. The one year we waited until after Thanksgiving to plant our garlic, and we swore we would never wait that long again. For us, it's better to get it in the ground and not have to worry about it too much until the early spring.

Garlic cloves are typically planted 6 inches apart in rows spaced 2 feet apart. Garlic is planted using seed cloves. The first step in planting garlic is to get your hands on some seed cloves. These can be purchased from a garden center or seed company. You can also head to your local grocery store or farmer's market to get seed cloves. Pick out the type of garlic you want to plant. You will have better luck if you can find garlic varieties that are grown in your area. Choose heads of garlic that are firm and have tightly clustered cloves. There should be lots of dry, paper-like skin covering the cloves and heads. When you get home, separate the cloves and leave them on your kitchen counter with the skins intact. The bigger the cloves, the better the chances of growing high quality garlic.
We like to save the few biggest cloves from each head of garlic we grew the previous season as our seed garlic. For softneck varieties, this means we usually save 4-6 of the biggest cloves per head. For hardneck varieties, we typically get 2-3 seed cloves per bulb.
Steps for Planting Garlic
Make sure the soil is adequately prepared in your garden. It should be tilled until loose and airy to a depth of 6-8 inches. The soil should be relatively dry and free of rocks and plant debris.

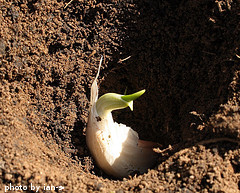
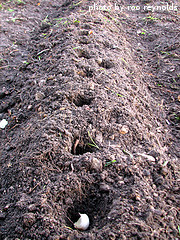
Use a hoe and create a trench 3 inches deep. Good soil drainage is the key to successfully growing garlic. If you live in an area with dense, compact soil such as clay, you can create a trench 6 inches deep and put down a layer of small rocks or gravel in the bottom of the trench. Or you can make raised rows, which is how we do it. After you've created an appropriate row, backfill it with loose, airy dirt that is fine in texture. Avoid stepping on the row or compacting the soil in any way. Using you finger or the handle end of a hoe or trowel, poke a hole in the dirt 2 inches deep. Place a single garlic clove root-down with the point pointing up into the hole. Cover the clove with loose, airy soil. Continue using this method to plant the row, spacing the cloves 6 inches apart. If you are planting garlic in more than one row, space the rows 2 feet apart. After you're done planting, LIGHTLY water in the rows until the soil surface is slightly damp. Be extra careful not to over-water. If the seed cloves sit in cold, wet soil for very long, they will begin to rot.
In our own garden we typically add a balanced granular fertilizer to the soil before we plant. We scatter it at a rate of 1 pint per 200 square feet. We also scatter pulverized lime as our soil is a bit acidic and lacks calcium. We till these additives into the soil and then water them in. We then wait about a week and till one more time before building our raised rows.
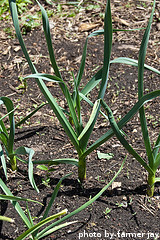
Now that you're done planting garlic, it's time to protect your crop from harsh winter weather by adding a layer of mulch. When the soil is fairly dry, apply a 3-4 inch layer of grass clippings, straw or chopped up leaves on top of the rows. This will help insulate the seed cloves and protect them from cold winter conditions. We personally like to use leaves that we gather in the fall from our many oak trees. We rake the leaves into piles and then suck them up with our leaf vacuum, which chops them up into small pieces. Whatever mulch you apply should be pulled back on the first warm day of spring, when air temps hit 55-60 degrees F. The garlic will begin to sprout as temperatures warm.
Click on the following links to learn more about maintaining and harvesting your garlic crop.

Click here to learn about watering and fertilizing garlic plants
Click here for information about harvesting garlic
Click here for some garlic recipe ideas
Click here for information about different garlic varieties
Click here to move from our Planting Garlic page to our Growing Garlic main page
Click here to go to our Home page